1. Introduction
One of the biggest challenges in Python programming is not writing code, but setting up a working environment. This is especially true in data science and geospatial analysis, where projects often rely on many libraries that need to work together.
Different projects may require different versions of the same package. Some geospatial libraries depend on additional system software for things like coordinate transformations or reading spatial file formats. When these pieces do not match, things break quickly.
This is where package management becomes essential.
Package managers help you install the right software, keep projects separated, and make sure your code runs the same way on different computers. Instead of fighting with installations, you can focus on analysis and problem solving.
Why package management matters
Geospatial libraries rely on complex system dependencies
Different projects need different package versions
Isolated environments prevent conflicts between projects
Reproducible environments make results reliable
Shared environment files support collaboration
In this course, we introduce Conda, which is well suited for geospatial software because it can manage both Python packages and system libraries. You will also get to know uv, a very fast tool for managing Python packages when system-level dependencies are not required.
The goal of this section is not to memorise commands, but to understand how to create reliable and reproducible environments. These skills will save you time, reduce frustration, and support professional geospatial programming workflows throughout your Spatial Data Science journey.
2. Learning Objectives
After working through this chapter, you should be able to:
Explain why package management and isolated environments matter for geospatial programming.
Create and manage project-specific environments using Conda.
Choose appropriate tools and practices to build reproducible and shareable Python environments, including when to use uv.
3. Installing Conda
Miniconda or Anaconda
You can choose between:
Miniconda: a minimal installation that includes only Conda (~50–100 MB)
Anaconda: a much larger distribution that comes with many preinstalled packages (~3–5 GB)
For this course, Miniconda is recommended. It is lightweight, transparent, and encourages you to install only what you actually need.
Both Miniconda and Anaconda can be installed either via:
a command line installer, or
a graphical installer
Here, we focus on the command-line installation, as it works reliably across systems and helps you better understand how your Python environment is set up. If you feel uncertain about using the shell, you may want to briefly review the basic commands and networking section in this Bash Tutorial by W3Schools before continuing.
Official installation guides (recommended):
Miniconda: https://
www .anaconda .com /docs /getting -started /miniconda /install Anaconda: https://
www .anaconda .com /docs /getting -started /anaconda /install
Take your time with the installation. A clean and well-understood setup will make the rest of the course much smoother. If you encounter any issues while installing Miniconda or the Anaconda Distribution, please refer to their website links for troubleshooting assistance.
Follow the steps below to install Miniconda using the command line. This approach is reliable, transparent, and works consistently across systems.
Open Windows PowerShell (not the regular Command Prompt) and paste the three commands below there.
To open PowerShell, press Windows key and type PowerShell
These three commands quickly and quietly download the latest 64-bit Windows installer, rename it to a shorter file name, perform a silent install, and then delete the installer:
curl https://repo.anaconda.com/miniconda/Miniconda3-latest-Windows-x86_64.exe -o .\miniconda.exe
start /wait "" .\miniconda.exe /S
del .\miniconda.exe
After installing, close the PowerShell and open Anaconda Prompt to use Miniconda.
Step 1: Download and install Miniconda
Run the following commands line by line in the Terminal.
These commands will:
create a directory called
miniconda3in your home directory (-pflag stands for parents)download the Miniconda installer script to your new miniconda3 directory
install Miniconda in silent mode (
-b), taking care of updates (-u), in the given path (-p)remove the installer script after installation
mkdir -p ~/miniconda3
curl https://repo.anaconda.com/miniconda/Miniconda3-latest-MacOSX-arm64.sh -o ~/miniconda3/miniconda.sh
bash ~/miniconda3/miniconda.sh -b -u -p ~/miniconda3
rm ~/miniconda3/miniconda.sh
Step 2: Activate Miniconda
After installation, close and reopen your Terminal, or run:
source ~/miniconda3/bin/activateYou should now see (base) at the beginning of your command prompt.
Step 3: Initialize Conda for your shell
Initialize Conda for all currently available shells so it works automatically in new terminal sessions:
conda init --allStep 4: Verify your installation
Run any Conda command. For example: conda list (displays a list of packages installed in your active environment and their versions) or conda --version (displays Conda’s version number).
(base) name@computer ~ % conda --version
conda 25.11.1
Do not auto-activate (base)
If you prefer a clean shell without automatically activating the base environment:
~/miniconda3/bin/conda config --set auto_activate_base falseAfter this, conda will be available, but no environment will be active by default.
As of August 15, 2025, Anaconda has stopped building packages for Intel Mac computers (osx-64). Existing Intel (MacOSX-x86_64) installers are still available at https://
Step 1: Download and install Miniconda
Run the following commands line by line in the Terminal.
These commands will:
create a directory called
miniconda3in your home directory (-pflag stands for parents)download the Miniconda installer script for Intel-based Macs
install Miniconda in silent mode (
-b), allow updates (-u), in the given path (-p)remove the installer script after installation
mkdir -p ~/miniconda3
curl https://repo.anaconda.com/miniconda/Miniconda3-latest-MacOSX-x86_64.sh -o ~/miniconda3/miniconda.sh
bash ~/miniconda3/miniconda.sh -b -u -p ~/miniconda3
rm ~/miniconda3/miniconda.sh
Step 2: Activate Miniconda
After installation, close and reopen your Terminal, or run:
source ~/miniconda3/bin/activateYou should now see (base) at the beginning of your command prompt.
Step 3: Initialize Conda for your shell
Initialize conda so it works automatically in new terminal sessions:
conda initRestart your Terminal afterwards if prompted.
Step 4: Verify your installation
Run any Conda command. For example: conda list (displays a list of packages installed in your active environment and their versions) or conda --version (displays Conda’s version number).
(base) name@computer ~ % conda --version
conda 25.7.0
Step 1: Download and install Miniconda
Run the following commands line by line to download and install the latest Linux installer for your chosen chip architecture.
These commands will:
create a directory called
miniconda3in your home directory.download the Linux Miniconda installation script for a 64-bit architecture and save the script as
miniconda.shin the miniconda3 directory. For other chip architectures look up this link.run the
miniconda.shinstallation script in silent mode using bash.remove the
miniconda.shinstallation script file after installation is complete.
mkdir -p ~/miniconda3
wget https://repo.anaconda.com/miniconda/Miniconda3-latest-Linux-x86_64.sh -O ~/miniconda3/miniconda.sh
bash ~/miniconda3/miniconda.sh -b -u -p ~/miniconda3
rm ~/miniconda3/miniconda.sh
Step 2: Activate Miniconda
After installation, close and reopen your Terminal, or run:
source ~/miniconda3/bin/activateYou should now see (base) at the beginning of your command prompt.
Step 3: Initialize conda for your shell
Initialize conda so it works automatically in new terminal sessions:
conda initStep 4: Verify your installation
Run any Conda command. For example: conda list (displays a list of packages installed in your active environment and their versions) or conda --version (displays Conda’s version number).
4. Understanding Conda Concepts
This section introduces the core ideas behind Conda that you need for the rest of the course. The goal is not to memorise terminology, but to understand how to think about software setups in a clean and reproducible way.
You will revisit these ideas repeatedly in labs and projects.
What is Conda?
Conda is both a package manager and an environment manager.
As a package manager, it installs software and libraries that your code depends on. As an environment manager, it keeps different projects separated so they do not interfere with each other.
In practice, Conda helps you answer two questions for every project:
What software does this project need?
Where should that software live on my machine?
This is especially important in geospatial programming, where libraries often depend on additional system software and specific dependencies need to work together.
What is an environment?
A Conda environment is a self-contained software setup for a project.
Each environment includes:
a specific Python version
a specific set of installed packages
the system libraries those packages rely on
Environments are isolated from each other. Installing or updating software in one environment does not affect any other environment.
This isolation allows you to:
work on multiple projects with different requirements
avoid breaking existing projects when installing new packages
reproduce the same setup on another computer
This idea can feel abstract at first: environments are invisible, but they strongly affect what Python can import and run. The explorer below visualizes this separation by showing how packages are installed into one active environment without changing the others.
Interactive Explorer: Conda Environment Playground.
Click an environment to activate it, toss package bubbles into the active environment, and test whether Python can import them. The animation shows that packages are installed only into the currently active environment and do not automatically appear in other projects. For improved visibility of the explorer, follow this link.
Best practice is to create one environment per project. If something goes wrong, you can delete the environment and recreate it without affecting your system.
What is a package?
A package (also known as a library) is a ready-to-use piece of software that adds functionality to your environment.
Packages allow you to reuse work done by others instead of writing everything from scratch. They include:
the software itself
information about versions and dependencies
instructions for installation
When you install a package, Conda ensures that the correct files are downloaded for your system, that all the necessary dependencies are installed and that everything works together. In geospatial programming, packages often contain compiled components as well as Python code. This is one reason why Conda is so useful in this field.
5. Working with Conda
This short tutorial walks you through creating and using your first Conda environment as part of a real Python workflow. You will create a small practice environment, install packages, inspect what is inside it, and then create the actual course environment used in SDS210.
The goal is not to memorise every command, but to understand the basic workflow:
create → activate → install → work → document → deactivateYou will first practise with a small environment called test-env. Later in this section, you will create the real course environment called sds210.
Creating a practice environment
The Conda installation process creates an environment called base, which is where Conda itself is installed. However, when starting work on a new project, it is best practice to create a separate environment. This keeps your projects maintainable and reproducible while also keeping your base environment stable.
In this first step, we create a small practice environment called test-env with Python 3.12 as the interpreter.
1. Open a shell application
Conda is a command-line interface tool, which means you use a shell application to run Conda commands.
Open Anaconda Prompt.
To find it, press the Windows key, type Anaconda Prompt, and select the application.
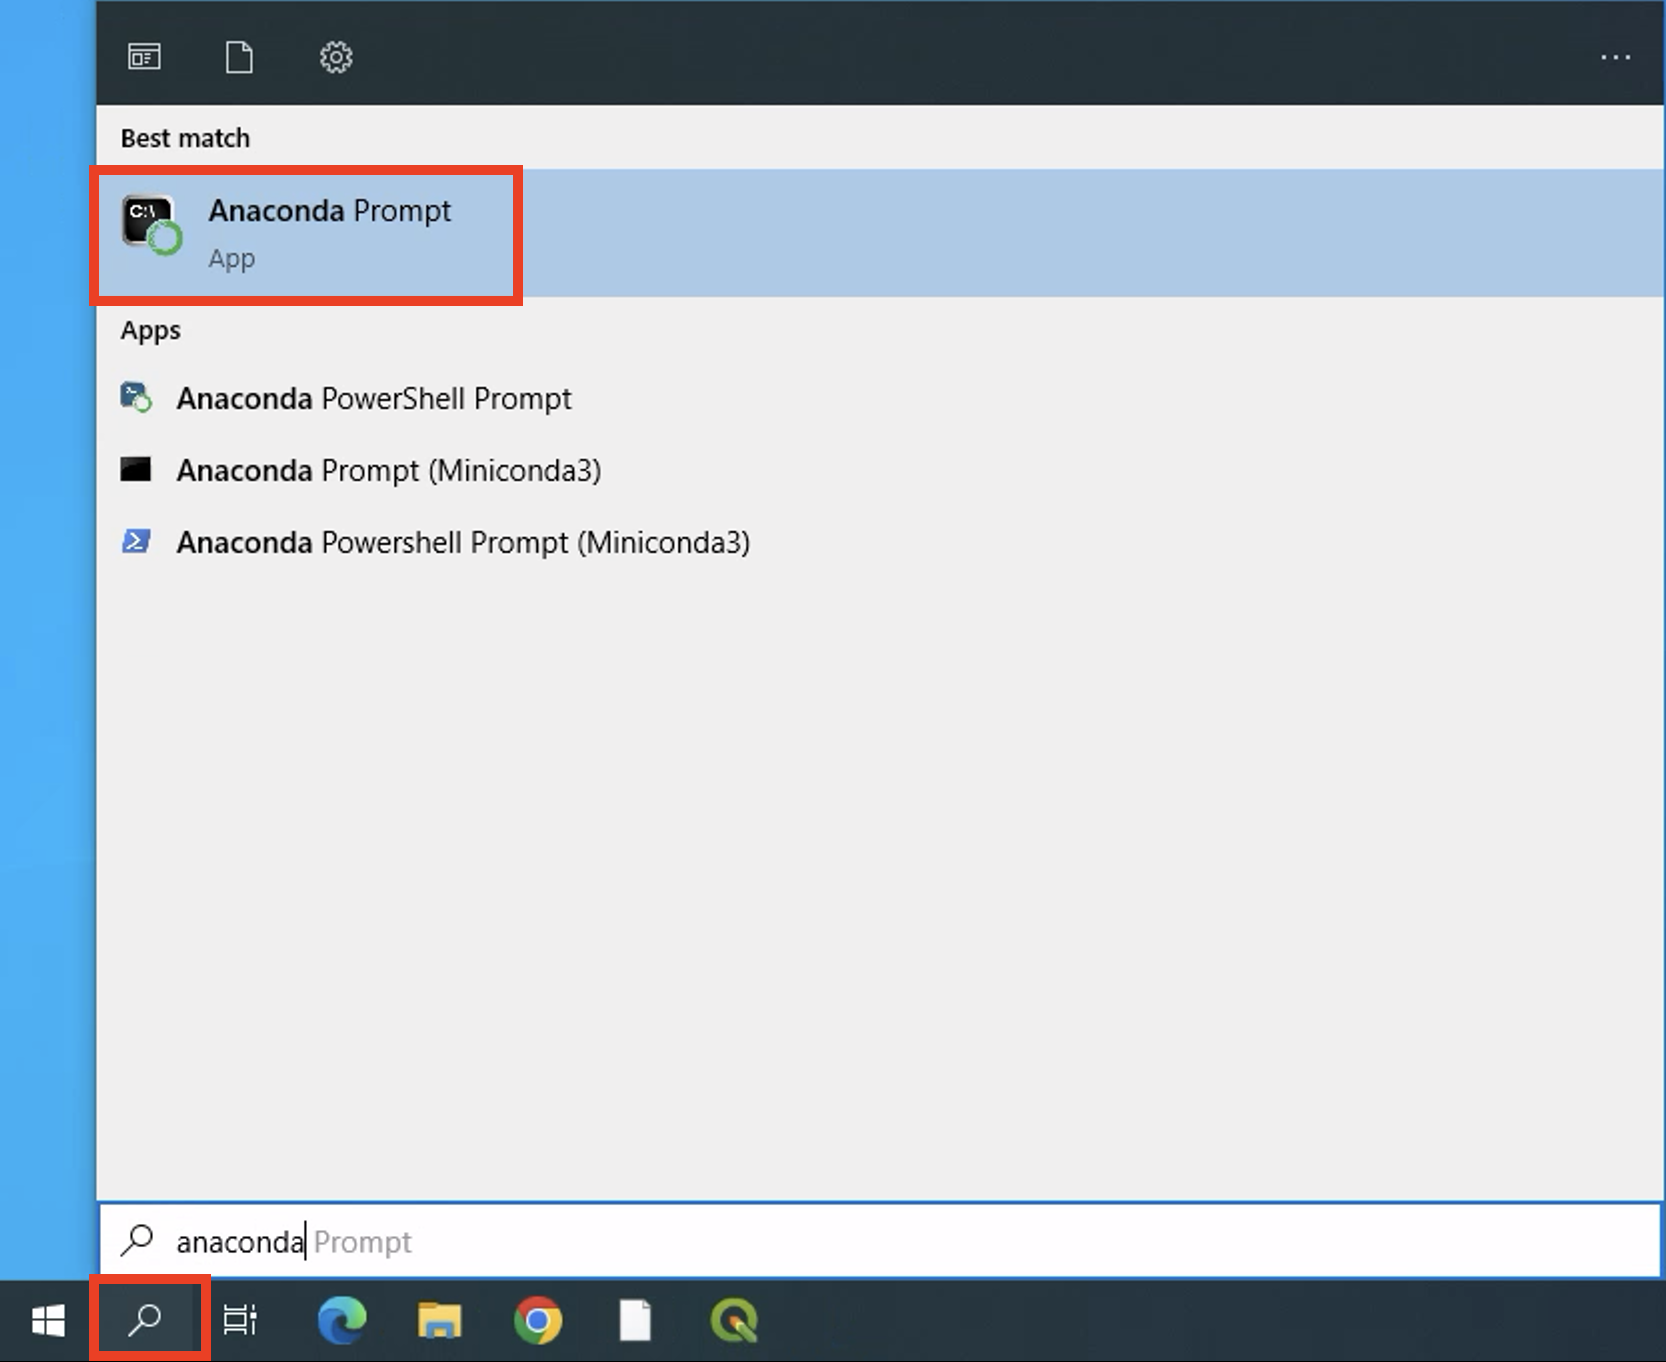
Opening the Anaconda Prompt application.
Open your system Terminal.
On macOS, open Spotlight with Cmd + Spacebar, then search for Terminal.
On Linux, press Ctrl + Alt + T or search for Terminal in your application menu.
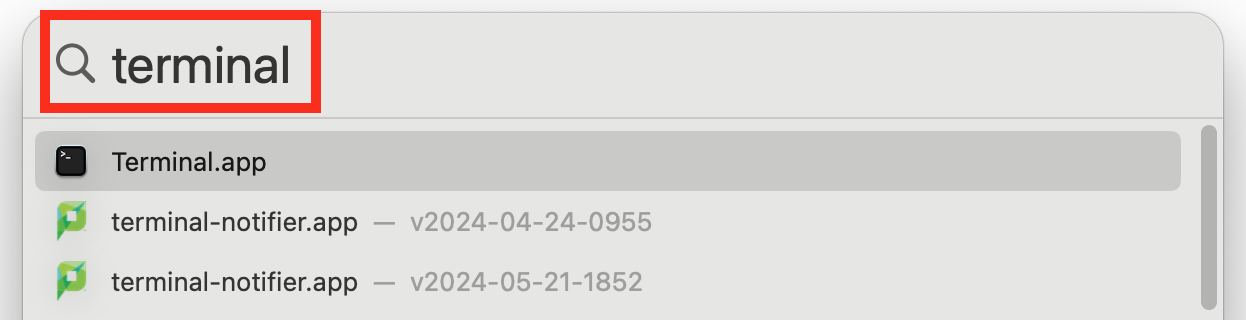
Opening the Terminal to use Conda.
2. Create a new environment
Use the copy button 📄 to copy the command below, paste the command into your shell (Anaconda Prompt or Terminal) and press Enter (Windows) or Return (macOS/Linux) to run it.
conda create --name test-env python=3.12This command tells Conda to:
create a new isolated environment
name it
test-envinstall Python 3.12 inside that environment
The --name flag assigns a human-readable name, which makes the environment easy to activate and manage later.
Conda may ask you to confirm the installation. If the package list looks reasonable, type y and press Enter.
When you create a named Conda environment, Conda stores it automatically in its default envs directory.
C:\Users\<username>\miniconda3\envs\test-env/Users/<username>/miniconda3/envs/test-envYou usually do not need to interact with this folder directly. Conda takes care of activating, updating, and removing environments for you.
3. Activate and verify your environment
Before you can use an environment, you need to activate it.
conda activate test-envAfter activation, Conda displays the currently active environment at the beginning of your shell prompt.
(test-env) C:\Users\username>(test-env) ~From now on, every Python and Conda command you run applies to this environment.
You can verify this with:
conda info --envsThe active environment is marked with an asterisk (*).
You can also check which Python version is active:
python --version4. Deactivate your environment when you are done
When you finish working in an environment, deactivate it using:
conda deactivateAfter deactivation, you return to the previous environment and the environment name disappears from the prompt.
Adding packages to your environment
Right now, test-env only contains Python 3.12 and its basic dependencies. Most spatial data science workflows need additional packages that are not included in the Python standard library.
There are two common ways to install packages:
use
conda installfor packages available through Conda channelsuse
pipwhen a package is not available through Conda
1. Add Conda packages from conda-forge
For geospatial and scientific Python work, the most important Conda channel is conda-forge.
Make sure your test-env environment is active:
conda activate test-envThen install a package from conda-forge:
conda install --channel conda-forge xarrayThe --channel flag tells Conda to give the specified channel priority when installing packages and their dependencies. The shorter version is -c, so the following command is equivalent:
conda install -c conda-forge xarray2. Add packages with pip when needed
Sometimes you need a package that is not available through Conda but is published on PyPI. This is common for smaller or newer Python libraries.
In these cases, you can use pip, Python’s built-in package installer.
pip install poochWorking with Conda environments
At this point, you have created an environment and installed packages into it. Now let us look at how to inspect, update, copy, remove, and document environments during day-to-day work.
Think of this subsection as learning how to stay in control once your environment exists.
1. Check your environments
It is good practice to start a work session by checking which environments exist and which one is currently active.
conda info --envsConda lists all environments on your system. The environment marked with an asterisk is the active one.
2. Inspect what is installed
To see which packages are installed in an environment, including where they came from, use:
conda list --name test-env --show-channel-urlsThis helps you understand:
which packages are installed
which versions are used
whether they came from
conda-forgeor another channel
This is especially useful when debugging or documenting your setup.
3. Install and remove packages safely
If you need to modify an environment without activating it first, you can target it explicitly by name.
Install packages into a specific environment:
conda install --name test-env --channel conda-forge geopandas rasterioRemove a Conda-installed package from a specific environment:
conda remove --name test-env rasterioIf a package was installed using pip, remove it using pip as well. First activate the correct environment:
conda activate test-envThen remove the package:
pip uninstall pooch4. Update packages intentionally
Over time, packages receive updates. To update all packages in an environment:
conda update --all --name test-envUse this with care in active projects, as updates may change package versions and behaviour. For long-term or shared projects, updates should be done intentionally and documented.
5. Copy and clean up environments
Sometimes you want to experiment without breaking a working setup. In that case, clone the environment first.
Clone an existing environment:
conda create --clone test-env --name test-env-copyThis creates a full copy that you can safely modify.
When an environment is no longer needed, remove it completely:
conda remove --name test-env-copy --allRemoving unused environments keeps your system clean and avoids confusion later.
6. Export environments for reproducibility
One of the most important steps in professional workflows is documenting your environment.
Export an environment to a file in your current working directory:
conda env export --name test-env --no-builds > test-env.ymlThis creates a YAML file that records the packages and versions in your environment. The --no-builds option makes the file more portable by leaving out platform-specific build strings.
You can recreate an environment from such a file:
conda env create --name test-env-copy --file test-env.ymlA typical Conda workflow
By now, you have seen the full lifecycle of working with Conda for a project. The exact package names will change, but the workflow stays the same.
# create a new environment for the project
conda create --name test-env python=3.12

# activate the environment
conda activate test-env

# install required geospatial packages
conda install --channel conda-forge geopandas rasterio

# check what is installed
conda list

# work on your project
python analysis.py

# export the environment for reproducibility
conda env export --no-builds > environment.yml

# deactivate when you are done
conda deactivate
What matters is not the exact commands, but the pattern:
one environment per project or course
activate before you start working
prefer
conda-forgefor geospatial packagesuse
piponly when Conda is not an optiondocument environments for reproducibility
Think in environments, not installations. A clean environment is the foundation of reliable and reproducible geospatial programming.
Create the course environment sds210
So far, you practised with a small environment called test-env. For the actual SDS210 course, we use a predefined environment called sds210.
This environment is created from an environment.yml file. The file lists the packages needed for the course, so you do not have to install them one by one.
Download the environment.yml file to a suitable location on your computer where you will store your SDS210 course files.
Open Anaconda Prompt on Windows or Terminal on macOS/Linux.
Navigate to the folder that contains the
environment.ymlfile:
cd <path-to-sds210-repository-folder>Create the course environment:
conda env create --file environment.ymlActivate the course environment:
conda activate sds210Et voilà. You have just created your course environment sds210. This environment includes all packages required for this course.
The environment test-env was only created for practice. Once your sds210 environment works, you can remove test-env:
conda remove --name test-env --all6. Working with uv
So far, we introduced Conda, which is the main tool used in this course for managing geospatial environments. Conda is reliable and well suited for packages with complex system dependencies.
Sometimes, however, you may want a lighter and faster tool for Python-only workflows. This is where uv comes in.
What is uv and when to use it?
uv is a modern Python package manager written in Rust. It is designed to be extremely fast while remaining compatible with Python’s existing ecosystem.
Use Conda when:
working with geospatial libraries that depend on system software
installing packages like GDAL, GEOS, PROJ, geopandas, or rasterio
reproducibility across operating systems matters
Use uv when:
working with pure Python packages from PyPI
setting up small or temporary environments
prototyping quickly or running experiments
In this course, Conda remains the default, but uv is a useful complement to know.
Installing and creating an environment
You only need to install uv once to your base environment.
irm https://astral.sh/uv/install.ps1 | iexcurl -LsSf https://astral.sh/uv/install.sh | shNavigate to your project directory and create a virtual environment:
cd path/to/your/project
uv venv --python 3.12
Activate the environment:
.venv\Scripts\activatesource .venv/bin/activateInstalling and running packages
Install packages at high speed:
uv pip install jupyterlab leafmapInstall from a requirements file:
uv pip install -r requirements.txtRun Python or tools directly inside the environment:
uv run python script.pyuv run jupyter labA typical uv workflow
With uv, environments usually live inside the project folder.
This makes each lab self-contained and easy to reset.
Assume you are working in your SDS-labs directory:
SDS-labs/
└── lab-03/
1. Go to your lab directory
cd SDS-labs/lab-03This is where the environment will live.
2. Create a virtual environment
uv venvThis creates a local environment:
lab-03/
├── .venv/        ← virtual environment
└── notebooks/
You usually do not touch .venv directly.
3. Activate the environment
source .venv/bin/activate        # macOS / Linux
.venv\Scripts\activate           # Windows
Your shell now uses the Python from .venv.
4. Install packages for the lab
uv pip install geopandas rasterio jupyterlabPackages are installed only for this lab, not globally.
To check what is installed:
uv pip list5. Start JupyterLab
jupyter labJupyter opens in your browser
The notebook kernel uses the
.venvenvironmentYou work entirely in the browser
6. Finish your work
Stop JupyterLab In the terminal:
Ctrl + CDeactivate the environment
deactivate
Your system is now clean again.
7. (Optional) Record dependencies
To keep track of what was installed:
uv pip freeze > requirements.txtThis file allows you (or someone else) to recreate the environment later.
Conda vs uv at a glance
Both workflows follow the same logic:
create → activate → install → work → stop → deactivateKey takeaways
Conda is your main tool for geospatial environments
uv is a fast option for Python-only tasks
Knowing both helps you choose the right tool for the job
This is not about using more tools, but about using the right tool in the right context.
7. Best practices
As your projects grow, good habits around environments will save you a lot of time and frustration. The goal is not perfection, but clarity and control.
1. Keep environments simple and focused
Each project should have its own environment.
Good practice:
use descriptive but short names such as
test-env,sds210-project, orthesis-envinstall only what the project actually needs
remove environments you no longer use
Avoid putting everything into one large environment. Large environments are harder to debug, slower to solve, and difficult to reproduce.
2. Document environments early
An environment is part of your project, just like your code. Therefore, it is a good practise to:
export environments to a file
keep the file with your project
update it when dependencies change
This makes your work reproducible for yourself in the future, any collaborator or automated systems.
You do not need to export after every small change, but do it whenever the environment becomes important.
3. Prefer reliable packages sources
Installing packages is easy. Installing them well takes a bit of discipline. For geospatial work:
prefer
conda-forgespecify the channel explicitly
install Conda packages before using pip
This reduces conflicts and improves reproducibility.
4. Update and troubleshoot intentionally
When things go wrong:
check which environment is active
read error messages carefully
update conda before trying random fixes
If installations behave strangely, clearing cached packages can help:
conda clean --allBig picture
You do not need to memorise commands, but you should internalise these ideas:
environments isolate projects and prevent conflicts
conda-forge is useful for geospatial work
environments are part of your project documentation
clean setups lead to reliable results
Create a new environment for each project. This habit alone will likely prevent some hard-to-debug problems later on.
By following these practices, you are learning professional workflows that scale from coursework to research and real-world projects.
8. Exercises
These exercises help you practice the core skills needed to work confidently with Conda in real projects.
Exercise 1: Creating and Using a Project Environment
Goal: Create a clean Conda environment and use it for geospatial work.
Create a new Conda environment called
test-envwith Python 3.12Activate the environment
Install the
xarraypackage from theconda-forgechannelList all installed packages in the environment
Start Python and verify that the environment is working
Install
geopandasandrasterioexplicitly intotest-envCheck which channel each package was installed from
Deactivate the environment and confirm that it is no longer active
Create a second environment called
test-env-altwith Python 3.12Compare the installed packages between the two environments
Sample Solution - Exercise 1
# ============================================================
# Exercise 1 solution: Setting up your first geospatial environment
# Goal: Create a conda environment, install core geospatial packages,
#       verify installation, and export the environment for reproducibility.
# Notes:
#   - Replace environment names if you chose different ones.
# ============================================================

# 1) Create a new Conda environment called "test-env" with Python 3.12
# This creates an isolated environment with its own Python interpreter.
conda create --name test-env python=3.12

# 2) Activate the new environment
# From now on, all Python and Conda commands apply to test-env.
conda activate test-env

# 3) Install the xarray package from the conda-forge channel
# xarray provides data models for working with labeled arrays and datasets
conda install --channel conda-forge xarray

# 4) List all installed packages in the active environment
# This shows package names, versions, and build information.
conda list

# 5) Start Python to verify the environment is working
# You should see the Python prompt without errors.
python

# Inside the Python prompt, try a simple check (then exit Python):
# >>> import sys
# >>> print(sys.version)
# >>> exit()

# 6) Install additional geospatial packages explicitly
conda install --channel conda-forge geopandas rasterio

# 7) Check which channel each package was installed from
# This is useful for debugging and documentation.
conda list --show-channel-urls

# 8) Deactivate the environment
# This returns you to the base environment.
conda deactivate

# Confirm that test-env is no longer active
# The active environment is marked with an asterisk (*).
conda info --envs

# 9) Create a second environment with a different Python version
# This is useful for testing compatibility across Python versions.
conda create --name test-env-alt python=3.12

# Activate the second environment
conda activate test-env-alt

# List installed packages in test-env-alt
# At this point, it should contain only Python and core dependencies.
conda list

# 10) Compare environments by listing both explicitly
# You can visually compare package names and versions.
conda list --name test-env
conda list --name test-env-alt

# Deactivate when finished
conda deactivate
Exercise 2: Inspecting and Managing Environments
Goal: Learn how to stay in control once environments exist.
List all Conda environments on your system
Identify which environment is currently active
Inspect the installed packages in
test-env, including their source channelsInstall an additional package into
test-envwithout activating itRemove that package again
Update all packages in
test-envClone
test-envinto a new environment calledtest-env-copyRemove
test-env-copyonce you are done
Sample Solution - Exercise 2
# ============================================================
# Exercise 2 solution: Inspecting and managing environments
# Goal: Learn how to inspect, modify, and clean up Conda
#       environments once they exist.
# Notes:
#   - This solution assumes that "test-env" already exists
#     from Exercise 1.
#   - Commands are written to be run step by step in a shell.
# ============================================================

# 1) List all Conda environments on your system
# The active environment is marked with an asterisk (*).
conda info --envs

# Alternative command (does the same thing):
# conda env list

# 2) Identify which environment is currently active
# Look for the asterisk (*) in the output above.
# If test-env is active, it will be marked with *.

# 3) Inspect installed packages in test-env, including source channels
# This shows package names, versions, and where they came from.
conda list --name test-env --show-channel-urls

# 4) Install an additional package into test-env without activating it
# This is useful when managing environments programmatically or remotely.
conda install --name test-env --channel conda-forge maplibre

# 5) Remove the package again
# This cleanly uninstalls the package and updates dependencies if needed.
conda remove --name test-env maplibre

# 6) Update all packages in test-env
# Use this carefully in real projects, as updates may change behavior.
conda update --all --name test-env

# 7) Clone test-env into a new environment called test-env-copy
# This creates a full copy with the same Python version and packages.
conda create --clone test-env --name test-env-copy

# Verify that the new environment exists
conda info --envs

# 8) Remove test-env-copy once you are done
# Make sure it is not active before removing it.
conda remove --name test-env-copy --all

# Final check to confirm cleanup
conda info --envs
Exercise 3: Reproducibility with Environment Files
Goal: Practice exporting and recreating environments.
Export the
test-envenvironment to a file calledtest-env.ymlCreate a new environment called
test-env-copyfrom that fileActivate
test-env-copyand verify that it worksCompare the package lists of
test-envandtest-env-copyAdd one additional package to
test-env-copyExport the updated environment to a new file
Remove the original
test-envRecreate it only from the exported file
Sample Solution - Exercise 3
# ============================================================
# Exercise 3 solution: Reproducibility with environment files
# Goal: Practice exporting, recreating, and validating Conda
#       environments using environment files.
# Notes:
#   - This exercise assumes that "test-env" already exists
#     and contains geospatial packages from previous exercises.
#   - Commands are meant to be run step by step.
# ============================================================

# 1) Export the existing test-env environment to a YAML file
# This file captures package names and versions for reproducibility.
conda env export --name test-env > test-env.yml

# Optional sanity check: view the file contents
# cat test-env.yml

# 2) Create a new environment called test-env-copy from the file
conda env create --name test-env-copy --file test-env.yml

# 3) Activate test-env-copy
conda activate test-env-copy

# Verify that Python starts correctly
python --version

# Optional quick import test to confirm the environment works
python
python -c "import geopandas, rasterio; print('OK')"

# Deactivate again before continuing
conda deactivate

# 4) Compare package lists between test-env and test-env-copy
# This helps confirm that the environments are equivalent.
conda list --name test-env
conda list --name test-env-copy

# 5) Add one additional package to test-env-copy
# Activate the copy first
conda activate test-env-copy

# Install an additional geospatial helper package
conda install --channel conda-forge maplibre

# 6) Export the updated environment to a new file
conda env export --name test-env-copy > test-env-copy.yml

# Deactivate after finishing changes
conda deactivate

# 7) Remove the original test-env
# Make sure it is not active before removing it.
conda remove --name test-env --all

# Confirm that test-env is gone
conda info --envs

# 8) Recreate test-env only from the exported file
conda env create --name test-env --file test-env.yml

# Activate and verify the recreated environment
conda activate test-env
python --version

# Optional import check
python -c "import geopandas, rasterio; print('OK')"

# Final cleanup
conda deactivate
Reflection
After completing the exercises, take a moment to reflect:
Which step felt most confusing
Which command felt most useful
What would you do differently next time
Being comfortable with environments is less about memorising commands and more about knowing what to check when something breaks.
If you can create, inspect, export, and recreate environments confidently, you have mastered one of the most important foundations of professional geospatial programming.